The following pictures are for making shrouds that are "custom" fit to the coffin. A custom fit does a number of things:
1) It helps keep the coffin in a nice shape even if one of the cardboard tabs is missing,
2) It makes it quicker to assemble because there is no need for putting on the clips,
3) It makes disassembly easier because there are no clips to find/ remove/ keep track of, and
4) it eliminates fraying of the cloth and
5) It makes a nice clean finished fit ... it would make any professional coffin maker proud!
STEP 1 - Make a template: The following is a template for the shroud. It can be made out of a 4' x 8' cardboard sheet or cheap paneling. The dimensions should make a perfect custom-fit.
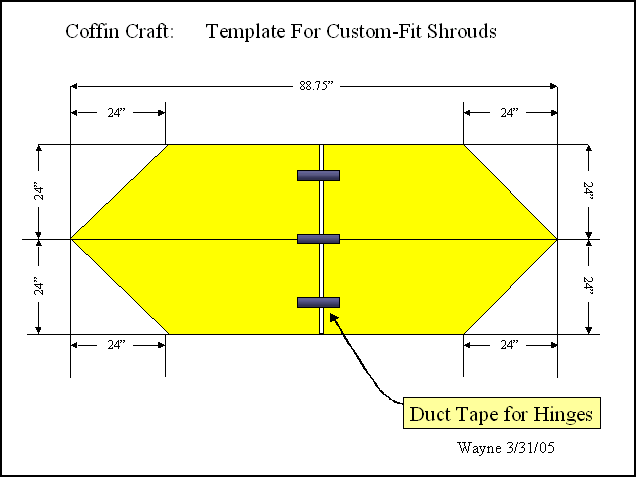
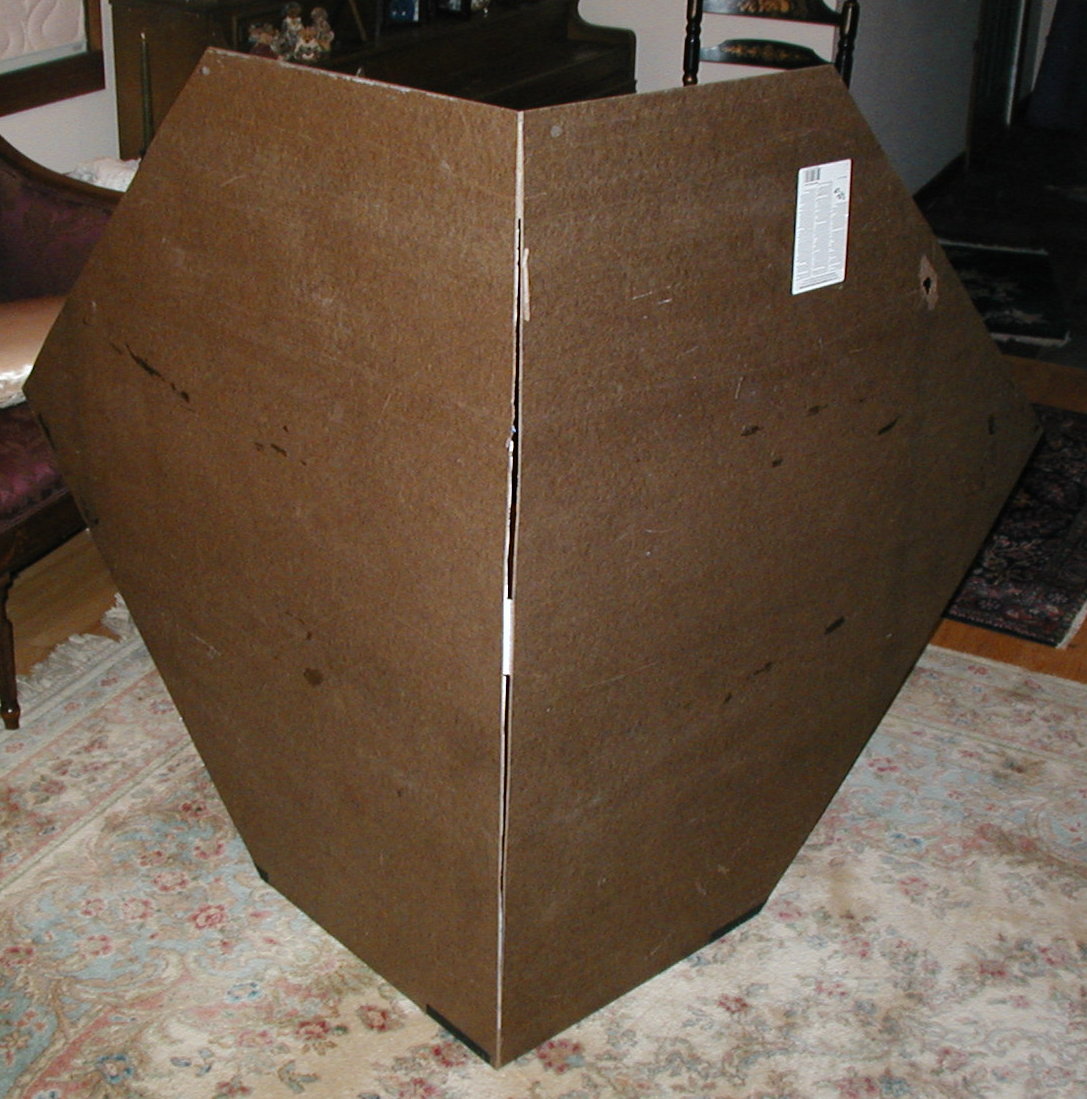
This is the template standing on end (for show) to highlight the duct tape hinge which is needed for the last step.
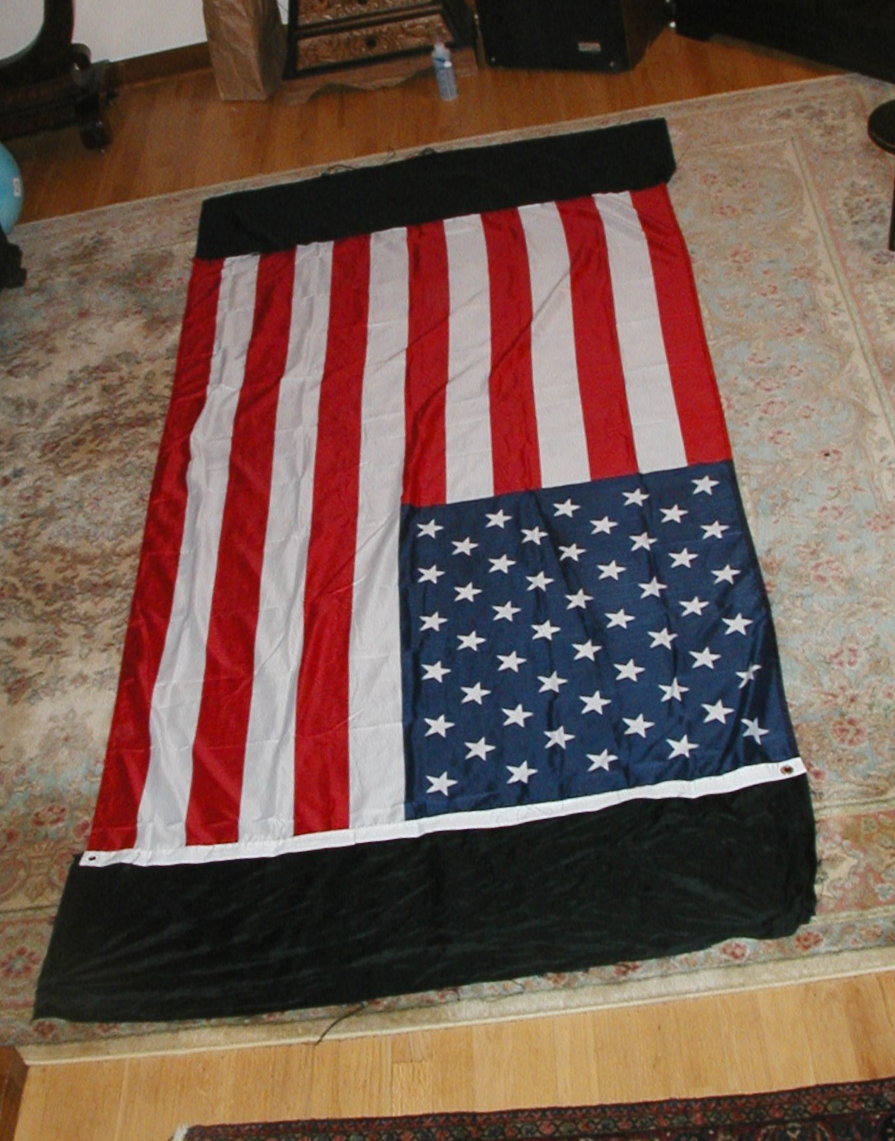
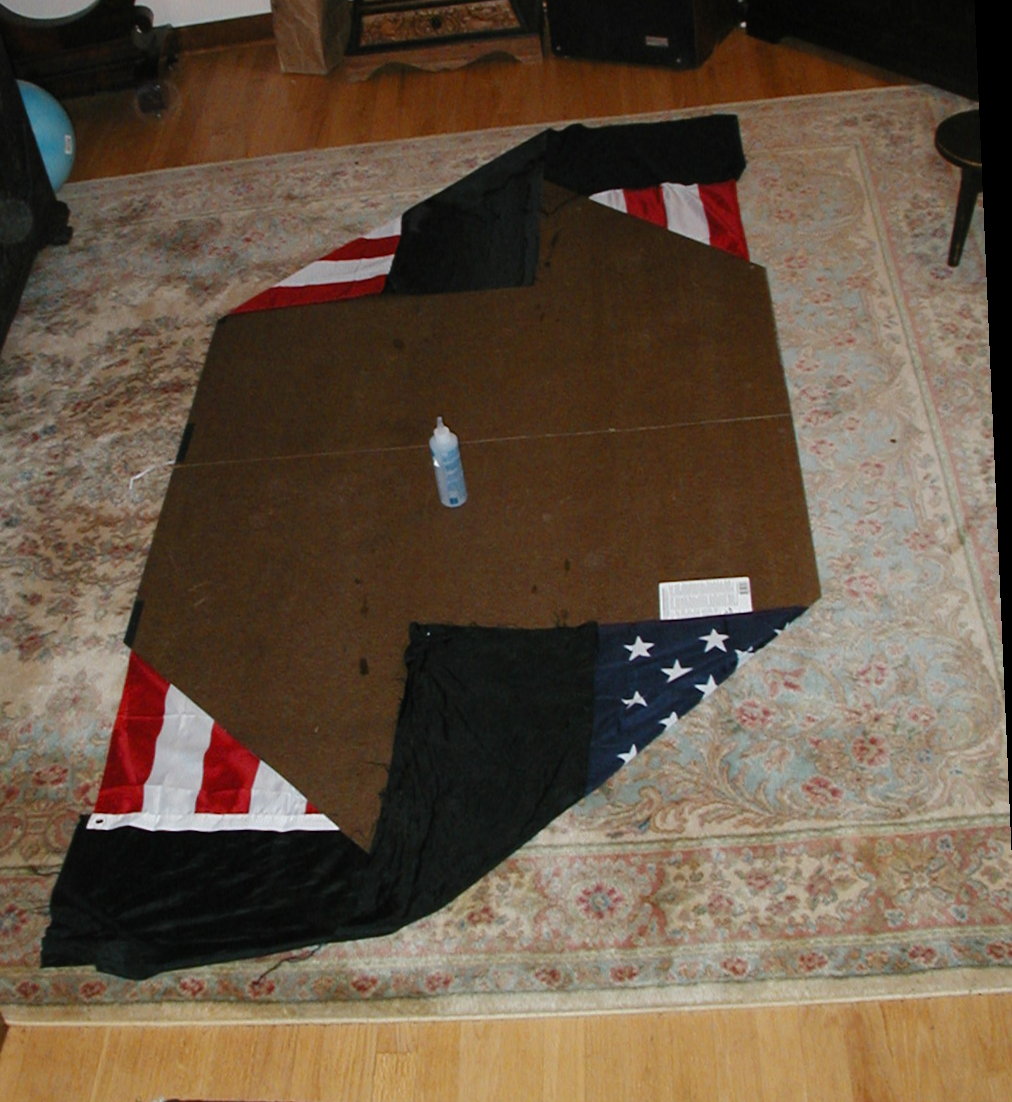
STEP 2 - Lay the Flag or Shroud Down: Make it square
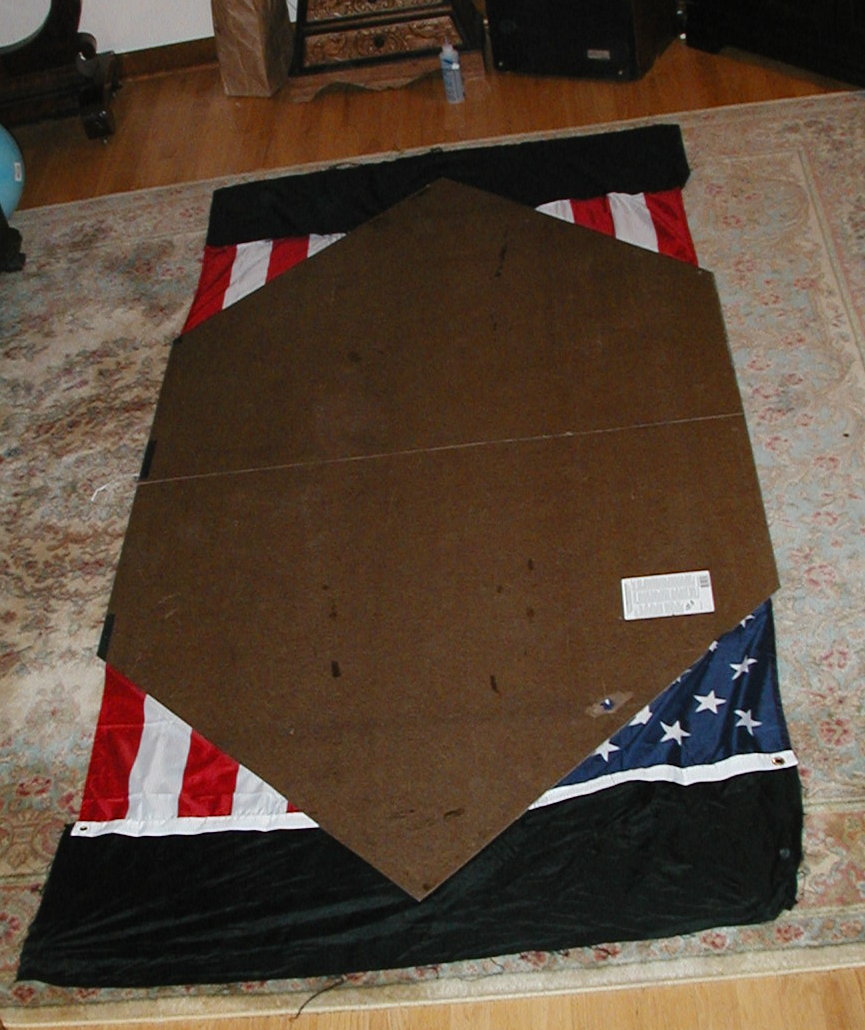
STEP 3 - Put the Template on Top: Center it on the flag both lengthwise and widthwise.
STEP 4 - Fold One Side of Each End as Shown: Then run a bead of fabric glue near the edge of the black fabric (not the edge with the stars or stripes ... the one that is al black ). Repeat for both ends.
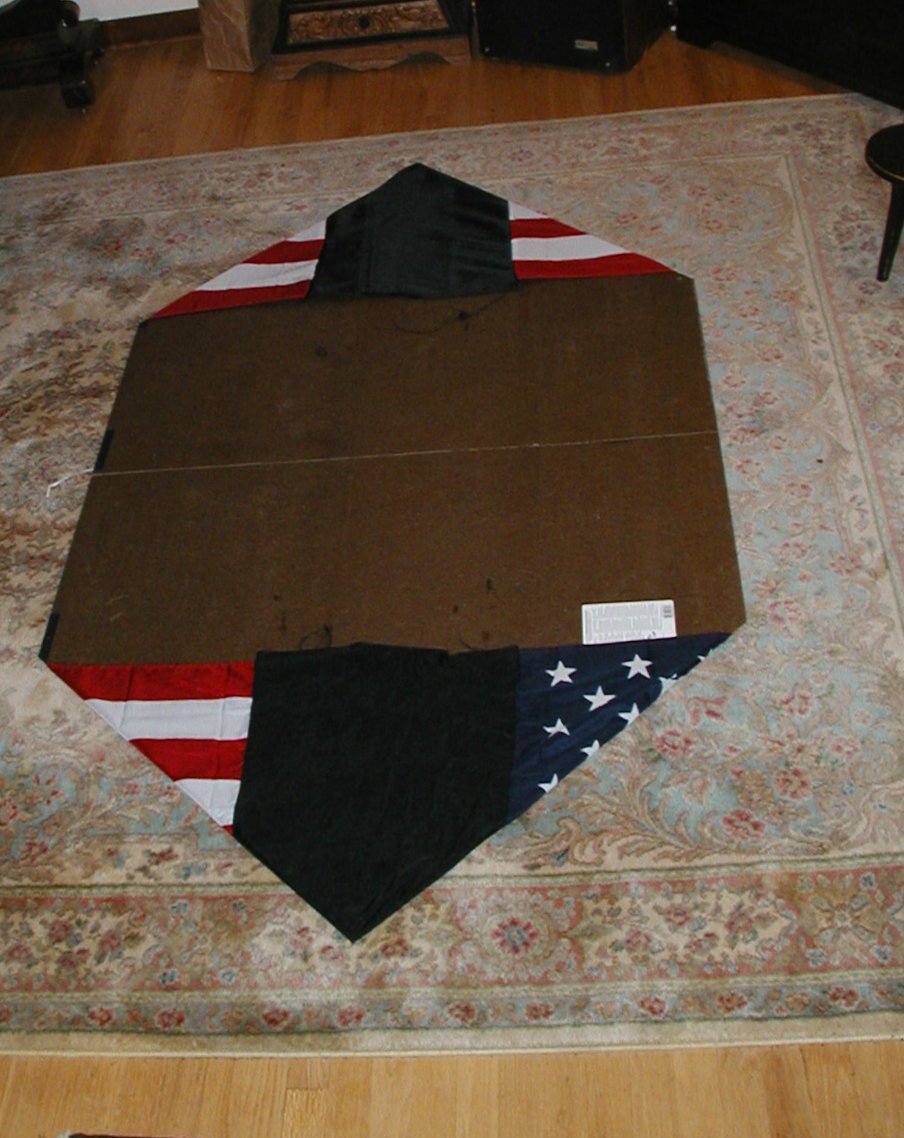
STEP 5 - Fold the Other Corners Over: Once the fabric is laying over the bead of fabric glue, run your finger over where the bead is to push the cloth together. Then fold back the top layer about one inch (lengthwise) and then put a bead of glue near the edge. Fold over and run your finger over where the bead of glue is to push the cloth together.
STEP 6 - Stand up the Flag / Shroud and bend at the hinges: The Flag or shroud can be easily removed.

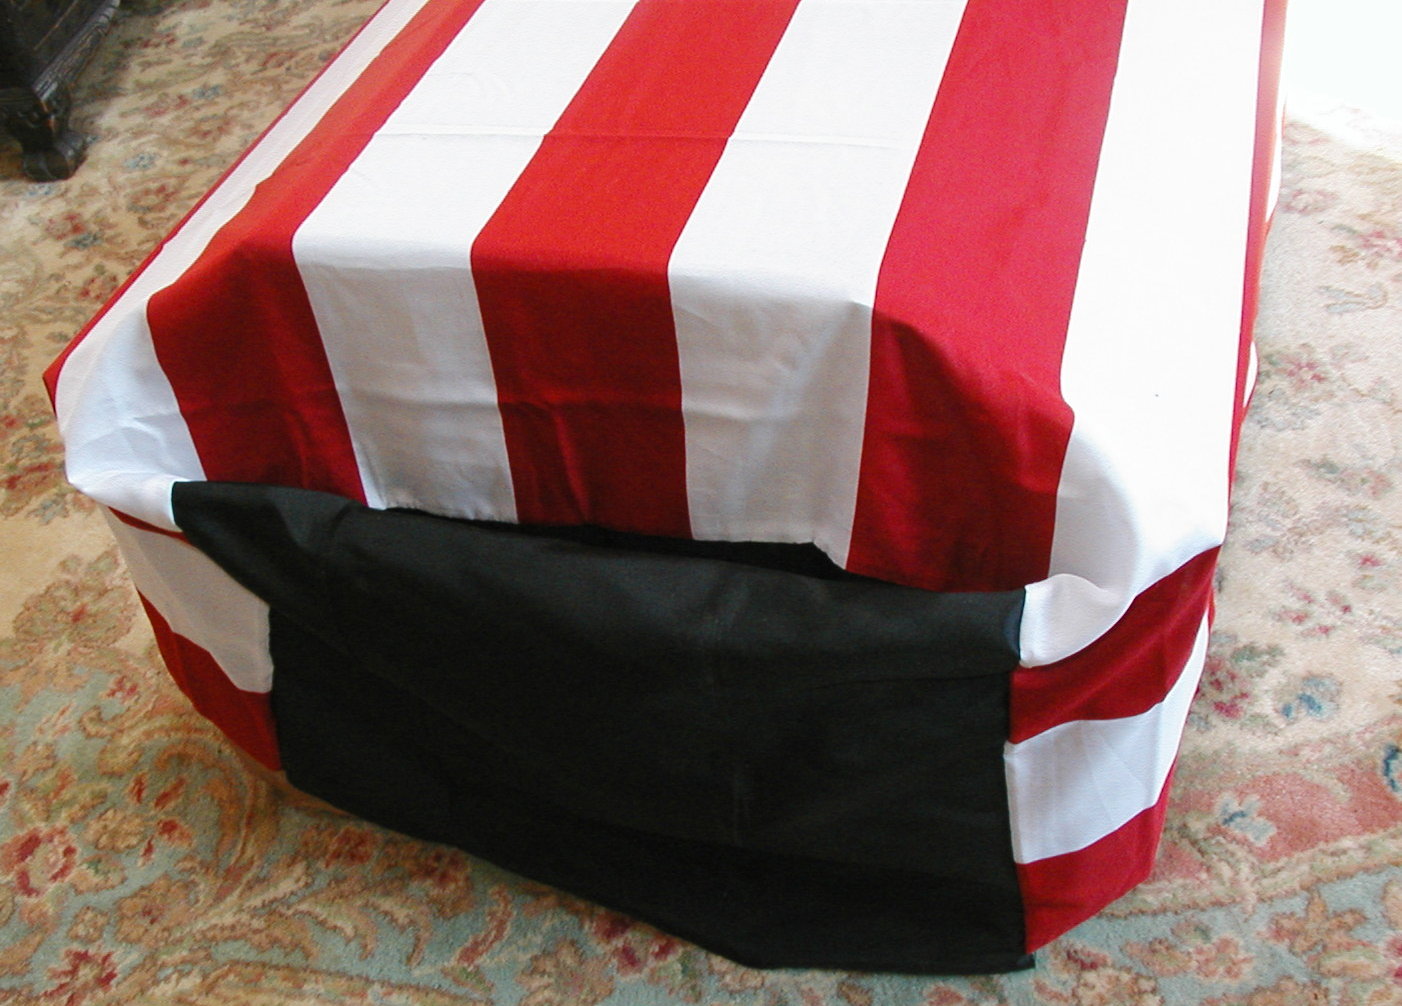
STEP 7 - Place Over a Coffin: It should be a perfect tailor-fit shroud. There will be a triangle of material at both ends. This triangle can be tucked into a pouch that forms when it is tucked in.
STEP 8 - Breeze through the Next Coffin Display Set-up and Disassembly: Your friends will clamor to help ... no bribes will be needed!